Basic Welding Techniques Explained!
There are quite a few welding techniques you will use in your welding. But which ones you use depends on the following:
In this tutorial we will discus some of the most common techniques.
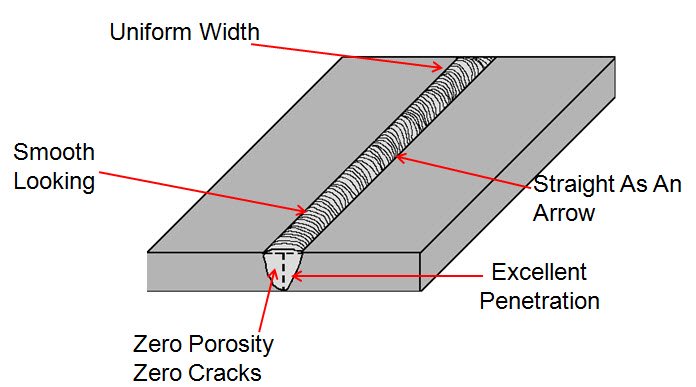
First, lets define what a good weld is. A good weld, whether it's a stringer bead or a weave bead will...
- Be Straight
- Be uniform in width
- Have fused edges and be smooth
- Not have porosity
- Not have undercutting
- Not have any cracks
- Not have any overlapping
A Good Weld Bead:
Welding techniques were developed over time in order to avoid problematic welds and defects and improve your skills. For example, heat input is the biggest factor when it comes to creating a good weld. If there is too little heat input there is poor penetration. If there is too much heat input you get burn through.
A common problem that welders have to deal with is distortion caused from welding. Distortion is basically when your metal warps.
As a matter of fact there are many problems that can occur as you weld, and this is covered here. But one of the main culprits is heat input.
Good welding technique at a fast pace will lessen or even eliminate distortion, burn through, cracking, and other problems.
Generally speaking, the parent metal will take in less heat the faster you weld. However, if you are slow you may cause to much heat input. And if you have are too fast you may not have enough heat input. It takes practice to control heat input.
Intermittent welding is one of several ways you can control heat and avoid warping.
Intermittent Welding Techniques:
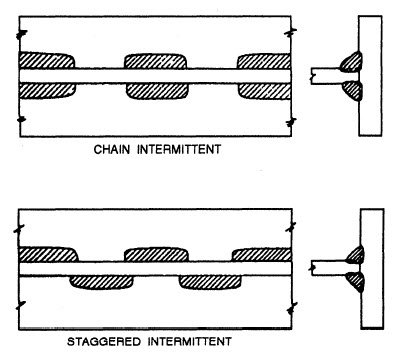
The first weld you learned is a string bead which is a continuous weld in a straight line. An intermittent weld is where you make a weld for two, three, or four inches, skip a the same distance you welded and then weld again or skip to the middle of your joint and weld.
After that you weld at the other end of your joint, and then go back to the other side and fill the space between welds and then finish it up.
Intermittent welding is also known as skip and staggered welding...
Intermittent Butt Weld:
The illustration below is a good exampled of how a staggered weld works. The number 1 is your first weld, 2 is the second and so on. Notice that 5, 6, and 7 are the skips.
Staggered Fillet Weld On A Tee Joint:
String Bead Welding:
A stringer bead is the most common and the most basic welding you will learn.
To make a stringer bead you drag your electrode straight across the seam.
There is no weaving or motion other than dragging or pulling.
Stitch Welding:
This video below shows you how to stitch weld a lap joint and it's very good:
Backstep Welding Techniques:
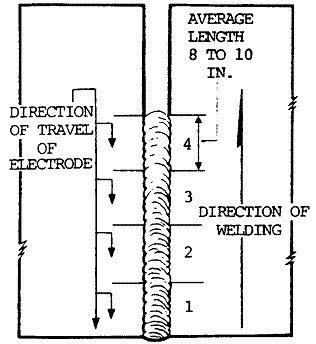
The backstep pattern is maybe a little bit more advanced but it's a good way to avoid distortion and cracking. So what you do is make small welds from the right side to the left side on the weld seam:
Backstep Welding Plate:
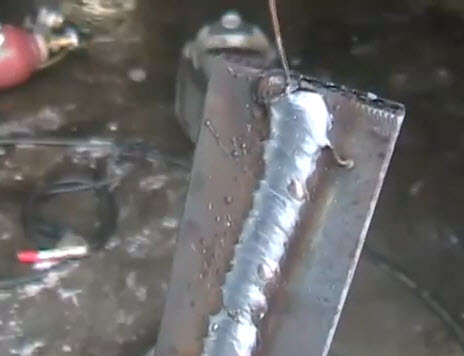
Backstep Welding Sheet Metal:
Weave Bead Welding!
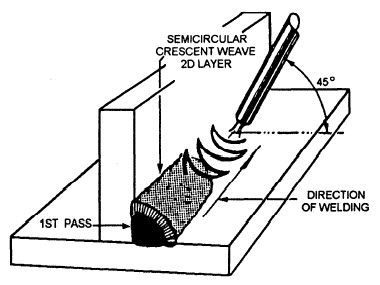
Weave bead welding is exactly as it sounds; you will make a weaving pattern in order to cover a larger area. You use this motion to make cover welds over stringer beads (multipass welding). In other words you use this when you are layering welds. It's used when you make two or more welds on the same seam.
The potential problems that can occur from poor weaving techniques is that you can undercut the weld bead edge as well as have bad fusion.
Basic Weave Patterns:
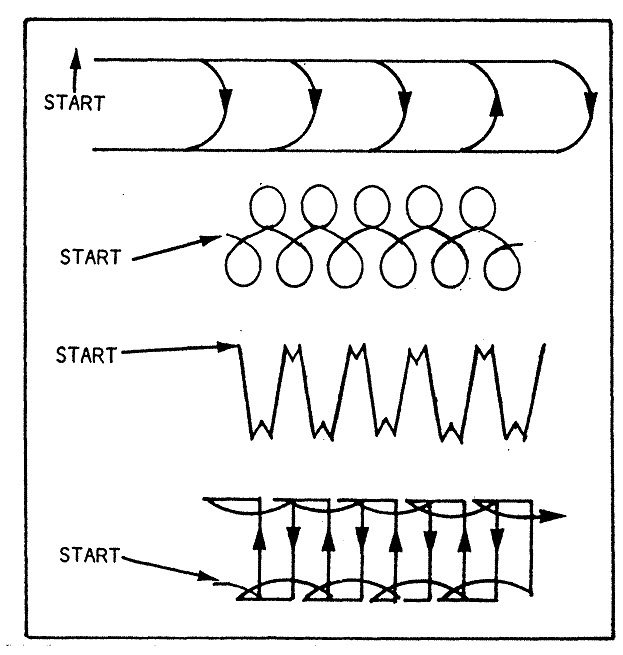
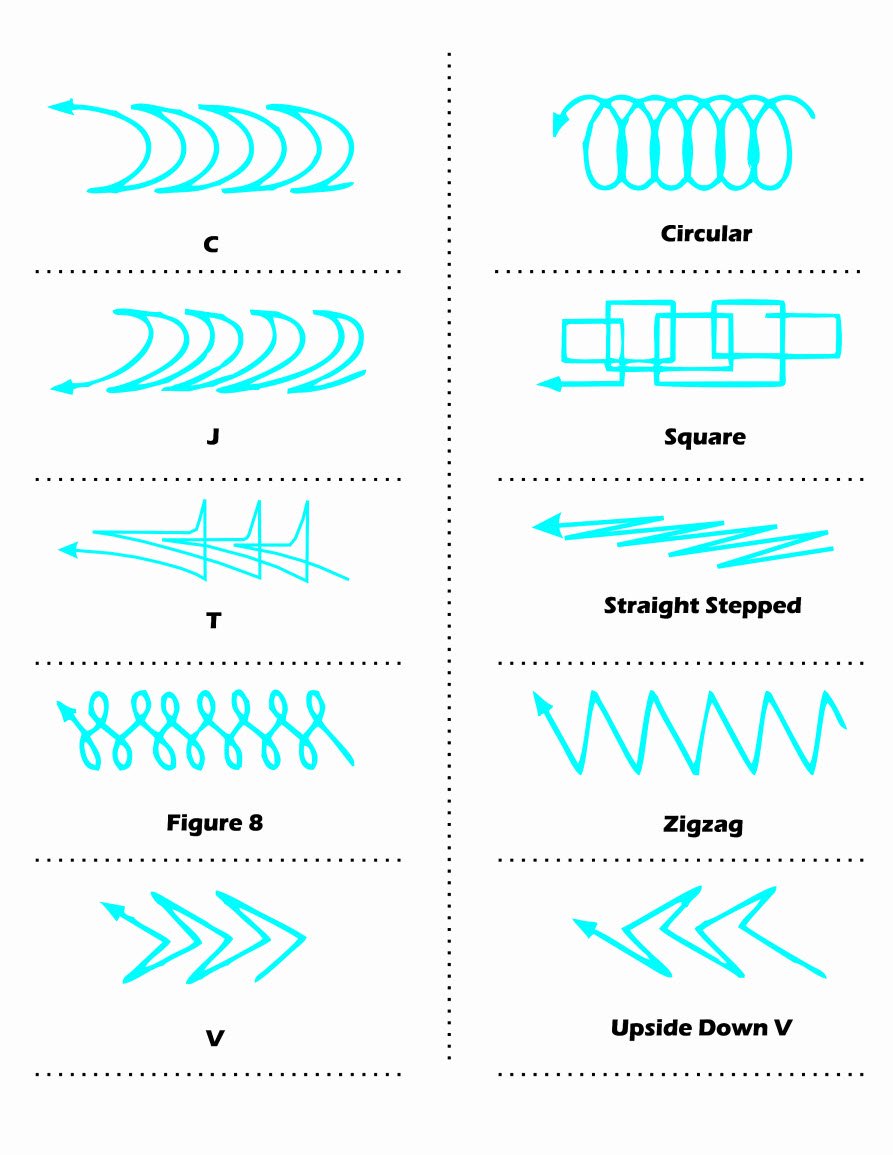
8 Weave Bead Welding Patterns Explained:
The following welding techniques are not all the ones you can use or try. There are many. But these are some of the more common ones that you can practice in addition to the ones above.
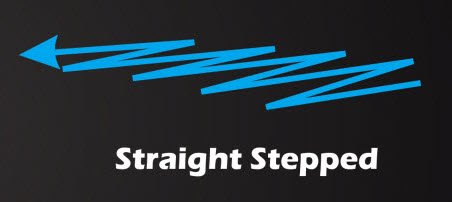
Straight-Stepped Weave Technique:
This is a commonly used technique for multipass welding, string beads. You can use this technique in all positions.
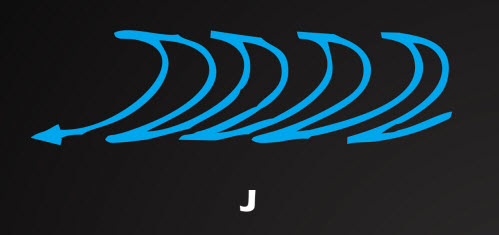
The J Technique:
The J welding technique is good for some lap joints and butt welds.
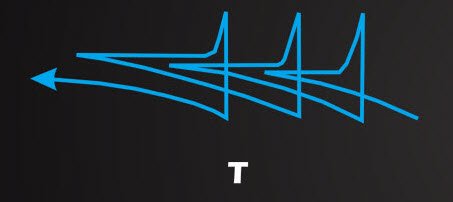
The T Welding Technique:
This is a good technique to use when you are in the vertical welding position or the overhead welding position.
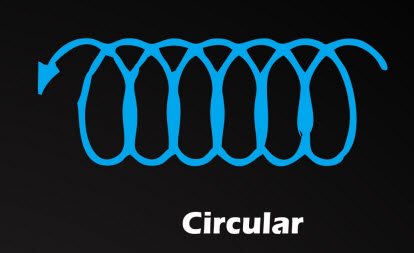
The Circular Weave Technique:
A circular motion can be a good technique for welding in the flat position. It's also good for other types of welding like surface welds.
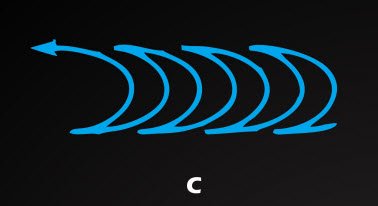
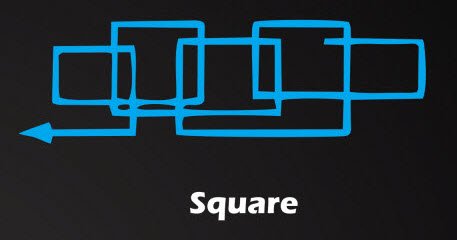
The C and the Square Weave Motion:
If you are welding in the flat position or the vertical welding position you can try this technique.
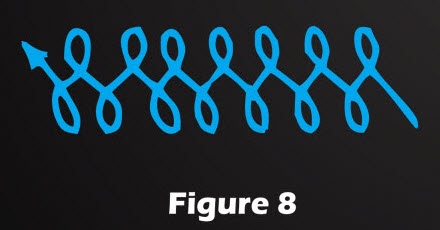
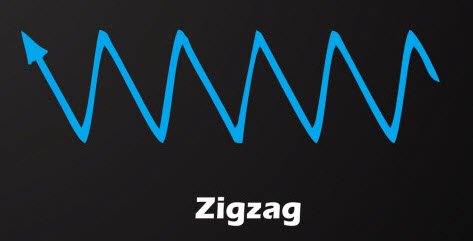
Figure Eight and The Zigzag Technique:
The figure eight and zigzag weaving motion is a good technique for making a cover pass when you are in the vertical welding position of flat welding position.
10 Techniques To Practice!
The chart below includes all 8 techniques above plus two more (the V and the upside down V which can be used uphill). Click the image for a larger view or to print. And for a PDF full letter size version click here.
Multi Pass Welding:
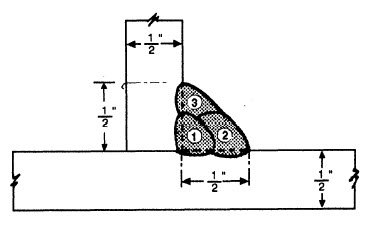
When you are welding thick plate you are going to need to make more than just one stringer bead weld to fill the gap and make it strong. So we do what is called multipass welding.
A multipass is when you lay several beads on the joint. And multipass requires you to use a weaving technique after you lay a stringer bead.
Tip: Make a short pause when you weave to avoid undercutting and achieve quality fusion of your material.
Here's another multipass welding example on .5 inch plate. If you are going to do a fillet weld on a tee joint and it's .5 inches thick or more make a stringer bead and then do two more passes as shown below:
Tack Welding:
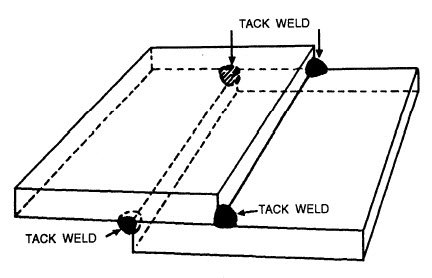
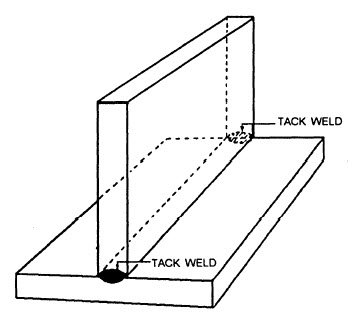
Basically, a tack weld is used to maintain stability of your metal as you weld. But it's also a good technique for avoiding distortion. For example, if you are welding square tube you might be tempted to tack weld each corner one after the other. And you should. But you first should put it in a vice, clamp it, or fit it in a jig and then tack weld each opposite corner to keep the gaps uniform around the tube.
Tacked Lap Joints:
Tack Welded Tee Joint:
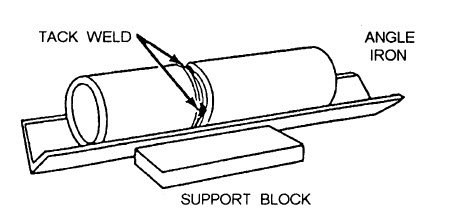
Tack Welding Pipe:
Tack welding pipe is a very important technique in pipe welding. And pipe welding can be a very technical craft. We will do a lengthy tutorial on basic pipe welding shortly:
Related Articles:
Welding Plans:
New! Welding Table
New! Log Splitter
Top Projects:
