Welding Table Guide!
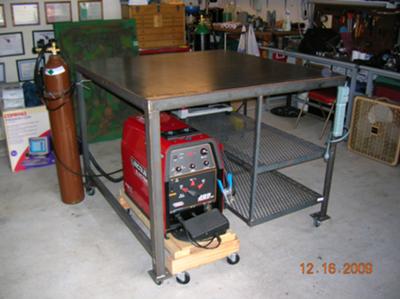
The welding table above was built by our Joe Grisafi, a loyal subscriber of ours. This is a really good build. It has a large surface area and has room for the welder and more.
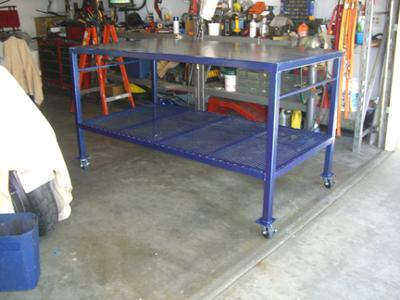
This table above was built by another loyal subscriber of ours, Julio Gonzalez. It's a simple design but that is what makes it useful.
It has a large surface area and plenty of storage area as well.
If you are building a welding table or have finished one please submit your project to us and share it here.
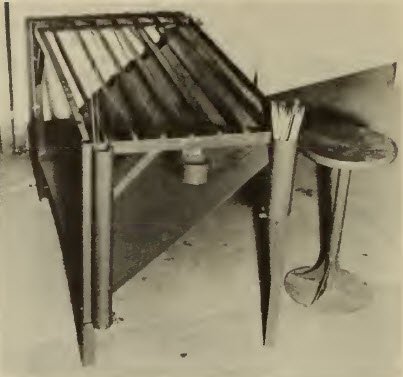
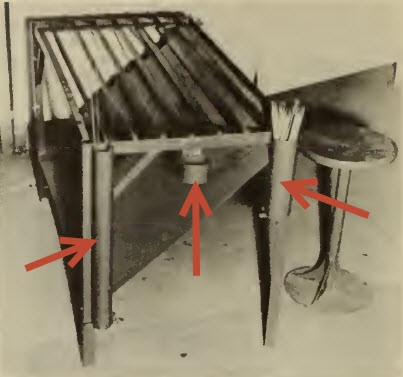
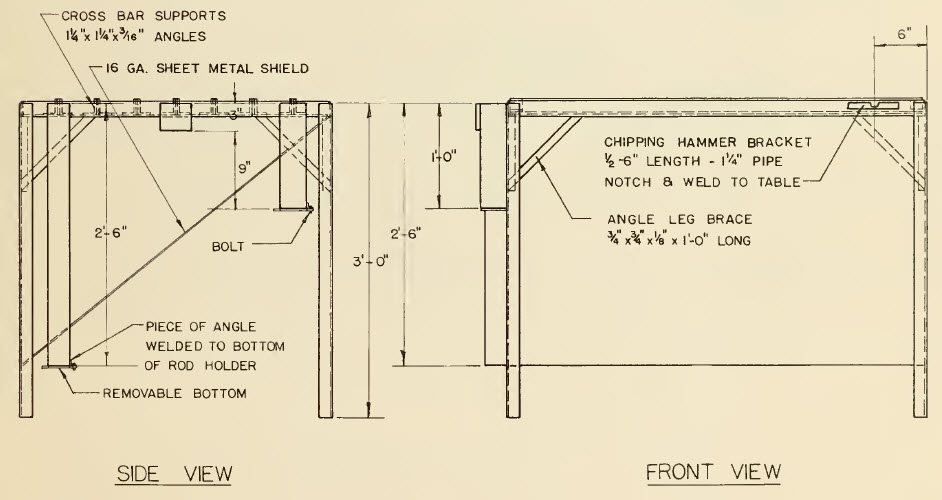
Now let me show you an old vintage welding table. I found the picture below in an old farm projects book that is from 1936. I really
enjoy that book and most of the plans in it are for equipment that is still handy today.
I just love old vintage equipment. So why not build some of it?
How To Build A Vintage Welding Table:
Step 1: What you want to do is cut out the corner notches. Then you want make a rectangle from your angle iron simple by bending and welding it.
Step 2: You'll need to cut a total of 28 pieces that are 1 inch in length of the 1.25 x 1.25 x 3/16 inch angle iron.
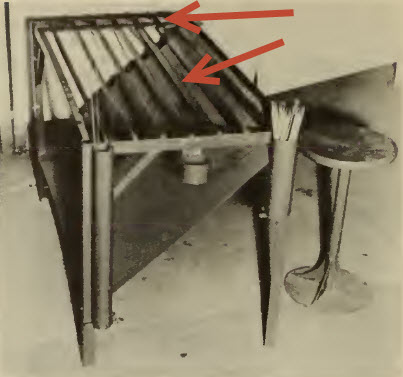
Step 3: Then you will weld these pieces into the inside part of your rectangular frame (the top part). Weld them to the end pieces so that they become slots which will hold the top bars (which are removable). All you have to now is cut each of the bars and fit them.
Step 4: Now make the welding table legs. You will need to brace these legs using angle iron: 1 foot of the .75 x .75 x 1/8 inch angle iron.
Step 5: Take your steel sheet which is the 16 gauge sheet and weld it into position. This is in position to protect your legs as you work on your projects.
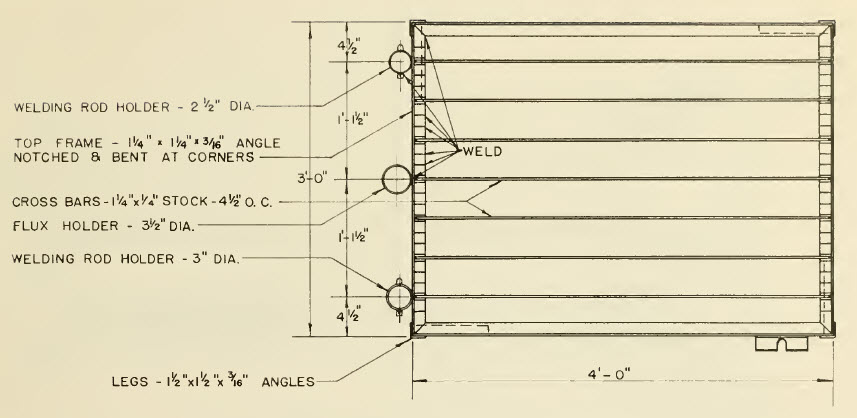
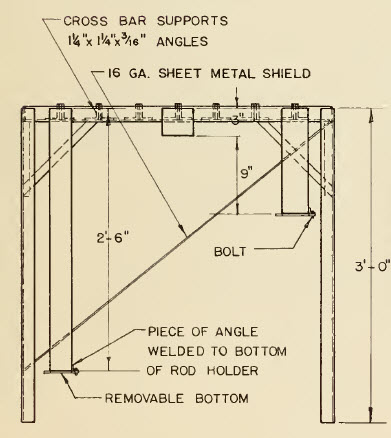
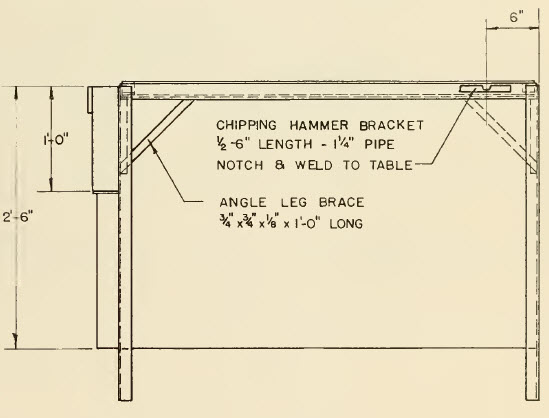
Step 6: The welding rod and flux holders, and the chipping hammer holder are simply welded on (see bill of materials and image). The holders have covers at the bottom of them and they should open so that you can clean them out (except for the chipping hammer holder). See the note in the bill of materials.
Vintage Welding Table Bill Of Materials:
- 16.5 feet of: 1.25 x 1.25 x 3/16 inches of angle iron
- 12 feet of: 1.5 x 1.5 x 3/16 inches of angle iron
- 4 feet of .75 x .75 x 1/8 inch angle iron
- 28 feet of: 1 x .25 inches of flat bar stock
- 16 gauge sheet: 4 feet x 4 feet of 16 gauge sheet metal
- 6 inches of: 1.5 inch pipe
- 2.5 feet of: 2.5 inch pipe
- 1 foot of: 3 inch pipe
- 2 inches of: 3.5 inch pipe
- Note: Use scrap metal (steel) and some bolts to build covers for your rod and flux holders.
Welding Table Plans: Top View.
Click Image For Larger Version.
Side View:
Front View:
Front and Side View Together:
All you need now is a shop stool to use at this vintage sit down welding table and you can weld small projects for years to come.
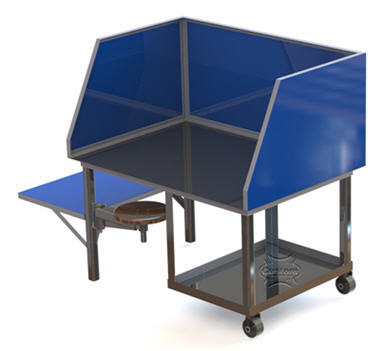
Now that you have been inspired to build a vintage welding table, consider building a more modern professional table like this one:
Free Welding Table Plans!
I would like to give you a free set of plans for the table above. You can get plans here.
On that page I will ask you to leave your name and email address so that I can send them to you. You will also receive my welding tips and tricks newsletter but you can unsubscribe anytime. It is also free and you'll get it weekly once you sign up for the plans.
If you don't get my Welding Tips and Tricks newsletter after you sign up to receive my free welding table plans let me know so that I can sign you up again. Thanks for your time and I hope you liked this article. If you did maybe you can share it using one of the social media buttons below?
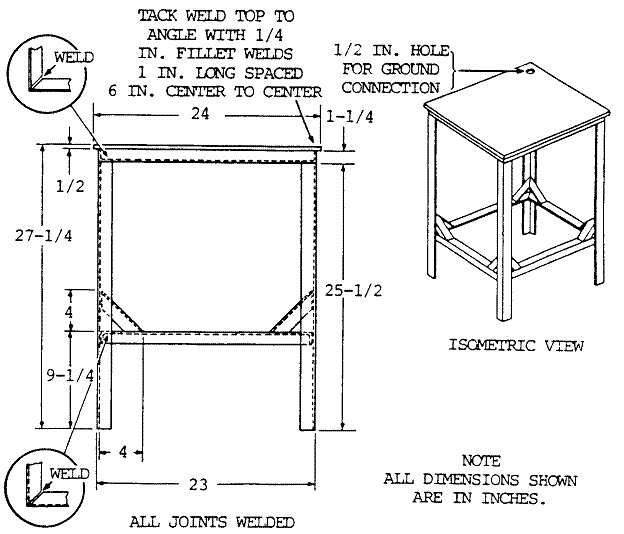
Basic Welding Table Design and Plans:
The image above is are plans for a very basic small welding table. This is ideal for small projects and also for putting in a small shop or garage. It's also a very simple build. You can build this in a few hours if you are experienced, or take the day and build this project and learn from it.
This table is has all the basic necessities for arc welding, particularly but it can be used for MIG and TIG as well.
What is not shown is an electrode holder attachment. You need a hook to hold your electrode holder or torch when you are not using it, and this should be insulated.
Lets See Your Welding Table!
Are you working on a welding table or did you finish one? Submit pictures and details on it here! Please provide as much information as you can. We can't wait to see it...
Check Out These Builds:
Click below to see contributions from other welders and metalworkers to this page...
Weld Table With Vice and Bender! 


I needed a welding table to start doing some projects, so after looking at several different designs and plans, I decided on this type of table.
I …
5/8 inch steel plate into 18 x 36 welding table? 


I'm just learning to weld. Have not even used the MIG gas yet, however, have done a few small projects, gates, latches and have done ok. A lot of the welds …
Related Articles:
Welding Plans:
New! Welding Table
New! Log Splitter
Top Projects:
