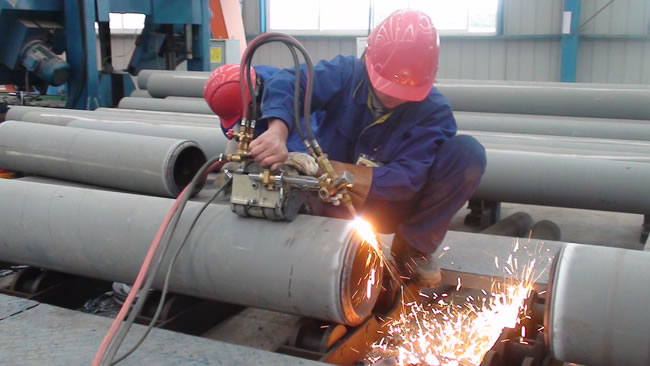
Pipe Welding Guide!
Pipe welding makes connecting pipe much easier than threading it. It's also less costly. Plus, you'll get better flow through pipe that has been welded together versus using connecting devices and other equipment for joining pipe.
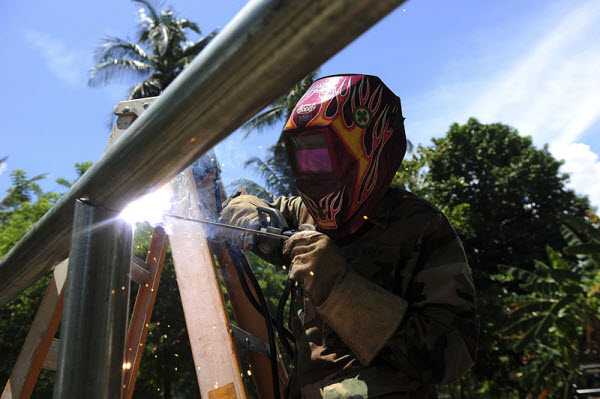
The most common welding procedure for pipe is stick welding (SMAW). But other methods like TIG and Oxy Acetylene welding are used as well.
There is a lot of room for employment in the pipe welding field. It's a specialty field all of its own.
Since pipe often has dangerous and hazardous stuff in them welder who specialize in pipe must get certified to be able to weld it, and means you have to pass tough tests.
Welding Positions:
Pipe welding has four positions:
1G: the horizontal rolled position. In this position the pipe is horizontal and it is being rolled so that
you, the welder, are actually in a flat position relative to the pipe.
It's the easiest pip welding welding position.
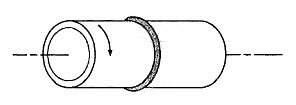
5G: the horizontal fixed position. 5G is a lot like 1G in that the pipe is in the horizontal position. The difference is that the pipe is stationary and not rolling as you weld, which makes it more challenging.
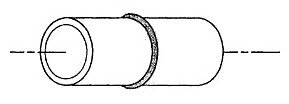
2G: the vertical position. The 2G position is where the pipe you are welding is vertical and you are welding in the horizontal.
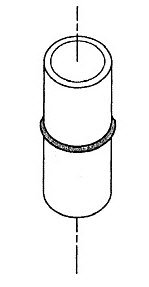
6G: pipe inclined fixed position. 6G is the most difficult of the pipe welding positions because the pipe is at a forty five degree angle and it is not rolling. And therefore you will need to be able to weld on all four positions to finish the 6G weld.
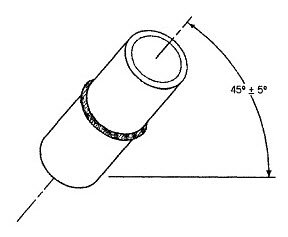
ATTENTION: The positions do not refer to the weld. The refer to the pipe. For example, if you are welding in the 6G position the pipe is fixed and at an incline. Not you or the weld.
Also, the letter 'G' stands for Groove Weld. And the majority of pipe welds are groove welds.
Lastly, 3G and 4G welding positions do not exist.
6G TIG Weld:
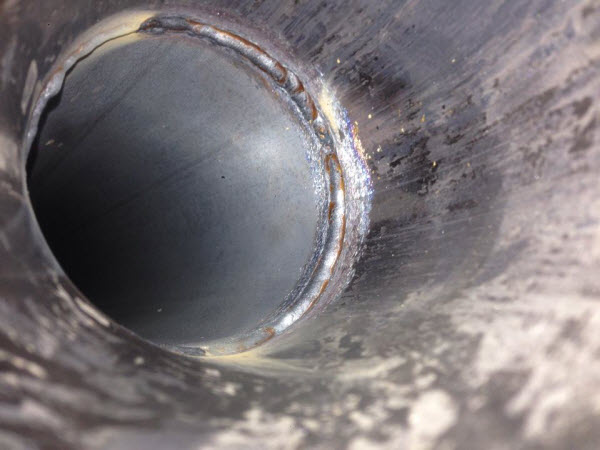
Here's what one of our Facebook subscribers, Johan de Graaf, has to say about this awkward 6g weld: "It's a dirty 6g tig weld, uphill, on an old dirty pipe! It's
an old gas pipe and it was very difficult to put a nice weld in and on it
because of the dirt and corrosion. But the x-ray was 100% good. This weld was
very awkward and it's a 90 degree elbow. Very old."
Pipe Welding Tips and Procedures:
Lets get right to it...
If you can't make a single pass then go with multi-layer beads. The rule of thumb is to use one layer of beads for each one eighth inch wall thickness of the pipe.
A common welding technique using the SMAW process is to weave your layer beads. But you should always lay a bead over a cleaned weld to avoid slag being deposited in the filler material.
The most common type of joint used for welding together pipe is a butt joint. Very simply, you take two pipes and put them together and now you have a butt joint to weld.
But if you are welding thicker walled pipe then you are going to bevel a V or U butt joint. Singles only.
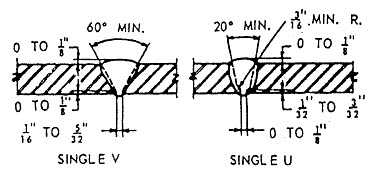
When you find that you have to weld flanges to your pipe you'll probably use a fillet weld whether the flange is a threaded or slip on.
But if you use a fillet weld on a flange you will probably have to weld both sides of it. It's is also possible that you may do a fillet weld on one side and a beveled one on the other.
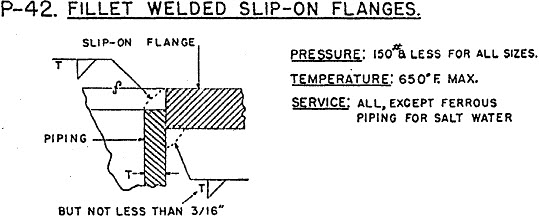
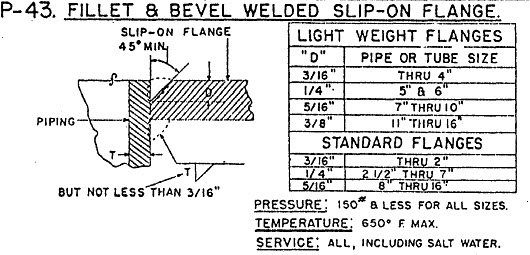
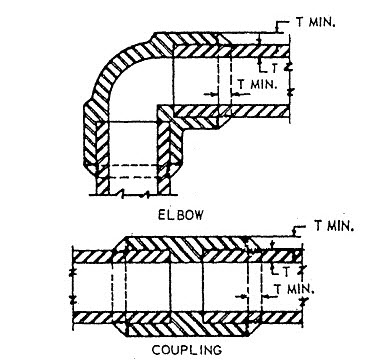
You can also use a single fillet when welding screw couplings on pipe or socket couplings.
Seal welding is sometimes required on pipe to ensure that the seal is tight so that it does not leak. However, a seal weld should not be thought of as a type of a fillet weld that adds strength to the joint.
Pipe Joint Fit Up and Preparation!
As with all welding procedures, your weld is only as good as your preparation of the joint. So you have to remove any material that will negatively affect your weld. That includes any oil or paint, rust or slag, and scale, etc. etc.
Be sure that the weld joint is uniform and as smooth as possible on the surface of it.
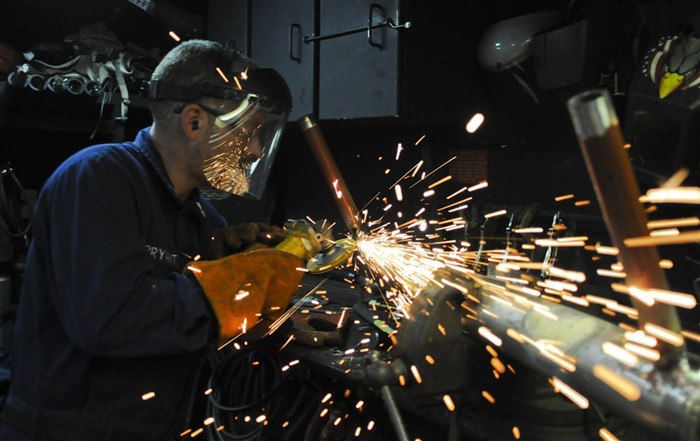
A well cut bevel is crucial to the success of your pipe welding procedure. It must be done properly. You can make a bevel using a grinder or a cutting torch. You can also machine it.
You can hand cut bevels using attachments to a grinder, or you can use beveling machines.
One that you might find useful is the Chamfo GTW series. These are portable milling machines which are specifically designed for welding preparation. The Chamfo can bevel a 45 degree angle and the depth of the bevel can go up to 10mm. It is a light weight milling machine.
The Chamfo is a low cost alternative that may do the job for you and you can hand bevel with just one hand using it:
Using A Cutting Torch For Beveling Pipe:
If you are working out in the field most welders defer to a cutting torch for making bevels. So be sure any slag you created from cutting with the torch is totally gone.
The pipe beveling tool pictured below is a flame cutting and beveling machine that is readily available on the market (along with others). This one in particular is made in China.
Pipe Welding Tips:
Don't cut more material than is necessary when beveling pipe and preparing metal. The reason for this is because you won't need to use as much filler material to complete your welding. The benefits are that you save save time (which is an expense), and you'll save money on filler metal. It also results in a good overall weld and job well done.
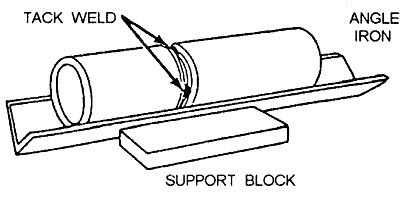
Try using angle iron a piece of I beam as a jig for aligning and holding your pipe in place as you weld. Because maintaining alignment is essential during the welding.
For small pipe use the angle iron. For larger pipe use the I beam.
Note: alignment tolerance is twenty percent of the thickness of the pipe wall. In other words, you can be off by a very little bit when aligning pipe so get it right.
Pipe Alignment Tool!
Aligning pipe properly can also be done with more modern methods. Check out this handy tool...
The Tack Weld:
Tack welding is another very important aspect to pipe welding. Tack welds hold your piece together in the alignment and position you want. If it is not in the right position or alignment then you simple remove the tack weld and re position your material.
Tack welding pipe is not rocket science but another rule of thumb to use is that for the tack weld length should not be more the two times the wall thickness of the pipe. The depth of the tack should two thirds.
- If you are welding .5" pipe then you just need 2 tacks welds on opposite sides of each other.
- 4 tacks are used for pipe that is standard in size.
A tack weld needs to have the same penetration and quality as the weld bead you will lay to finish the job. So don't tack over foreign material and thinks it's ok. It's not. You need to have a well cleaned and smooth area for your tack just like your final welding.
Electrodes:
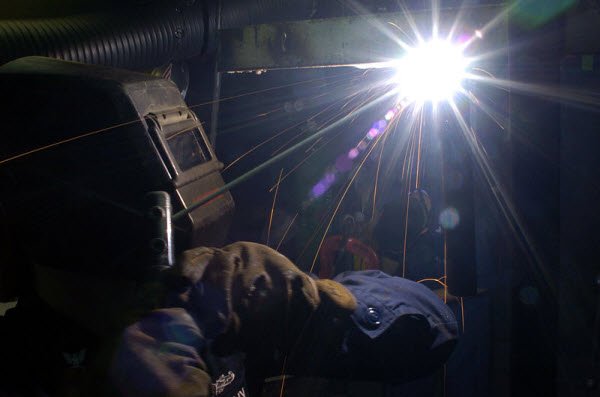
You will need to choose the right electrode for the welding job. As usual it depends on several variables including what position you are welding in, and the kind of welding you will be doing.
Some say that a three sixteenths electrode is the maximum you should go for multi layering welding for the root pass because if it's bigger you may not get good penetration and fusion of the weld, and without any slag or undercutting of the weld.
Select the electrode that is best suited for the position
and type of welding to be done
Using Spacers:
A spacer is a commonly used tool for achieving a well aligned joint. A spacer is a piece of metal that has been machined specifically for the joint you are welding.
You will also find language referring to spacers as a 'backing ring' or a 'chill ring'.
Spacers are very handy because you can use them for several purposes which include aligning pipe, making tack welds easier, keeping a root opening at the desired amount as you prepare and perform your welding, and keeping slag and spatter from getting in the pipe.
Do You Have Any Tips or Information On Pipe Welding?
If you weld pipe for a living or are retired, or if you have any tips to share on this subject our readers would love to hear about it.
What Other Visitors Have Said
Click below to see contributions from other visitors to this page...
Pipe Welding Now and In The Future! 


For both onshore and offshore pipeline welding activities, there have been notable advancements that have increased efficiency, reliability and productivity. …
Copyright WcWelding.com All Rights Reserved.
Welding Plans:
New! Welding Table
New! Log Splitter
Top Projects:
