Drum Grill Plans!
This drum grill building tutorial will show you how to build 55 gallon barbecue barrel quite easily.
In order to do this build you will need to have experience and the tools necessary to make welds and cut metal.
You can find 55 gallon steel drums either for free or for a small price by searching on Craiglist.org, or looking in a scrap yard. Someone is always wanting to get rid of these things.
Also, be sure (and I mean 100%) that the barrel you use has been thoroughly cleaned of any hazardous material inside and out before cutting or welding it.
Materials Required:
- 1 - 55 Gallon Steel Drum (FOOD GRADE).
- 11 Feet Of Hot Rolled Steel Square Tube: 1” X 1” X .12” (11 Gauge).
- 38.5 Feet Of Hot Rolled Flat Steel: ¼” X ¾” X 38.5’.
- 4.5 Inches of 1-1/2” Diameter Wooden Dowel.
- 1 - ¼-20 X 5-1/4” LG SS Hex Bolt.
- 1 - ¼-20 SS Acorn Nut.
- 2 - 3 X 2” Surface Mount Door Hinge.
- 1 - 24” X 3/4” X 8.5’ Diamond Expanded Sheet Metal.
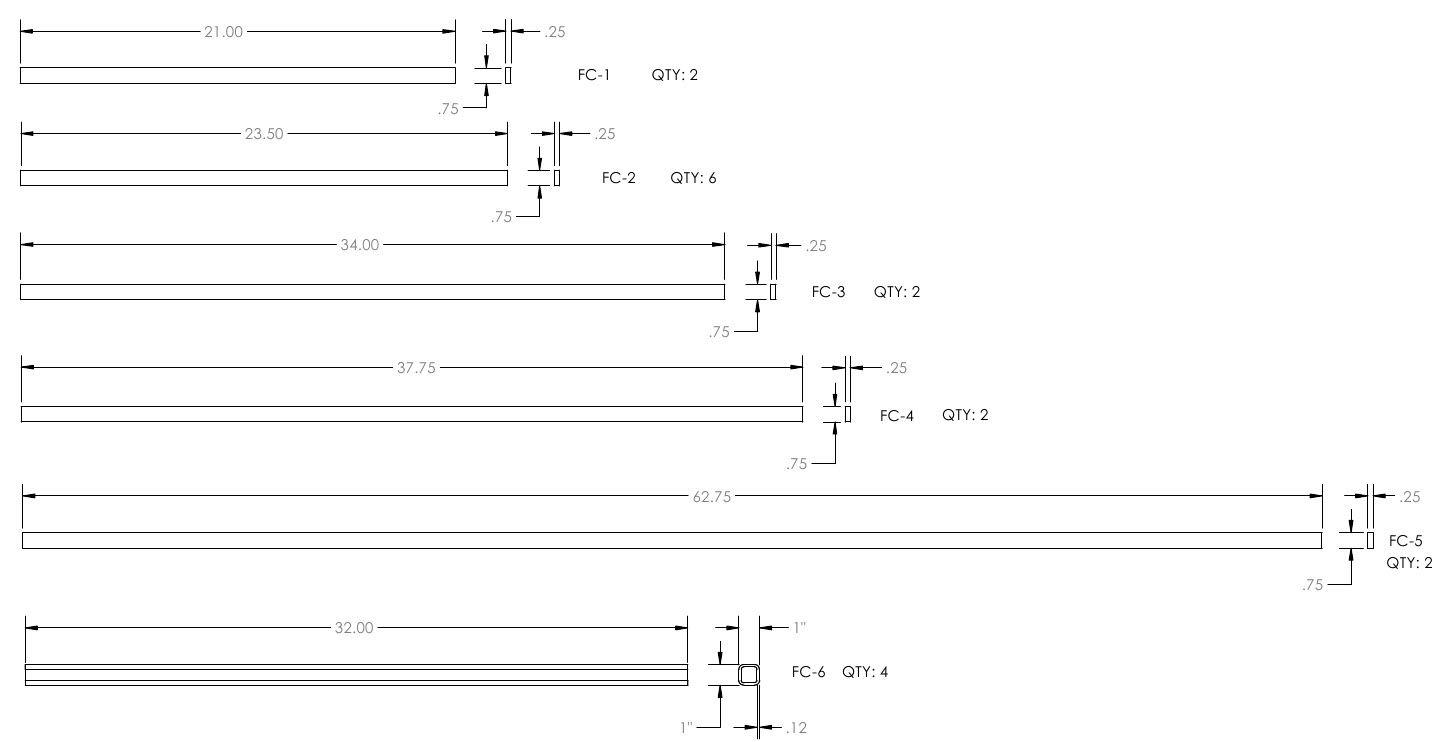
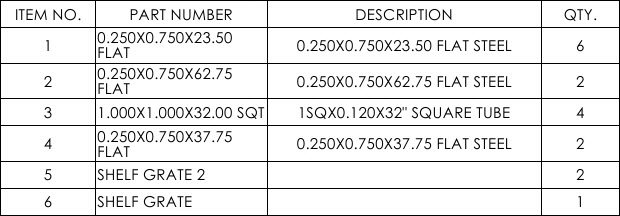
Cut Sheet:
How To Build A 55 Gallon Drum Grill In 10 Fairly Easy Steps!
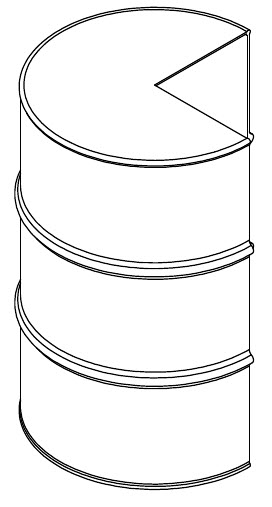
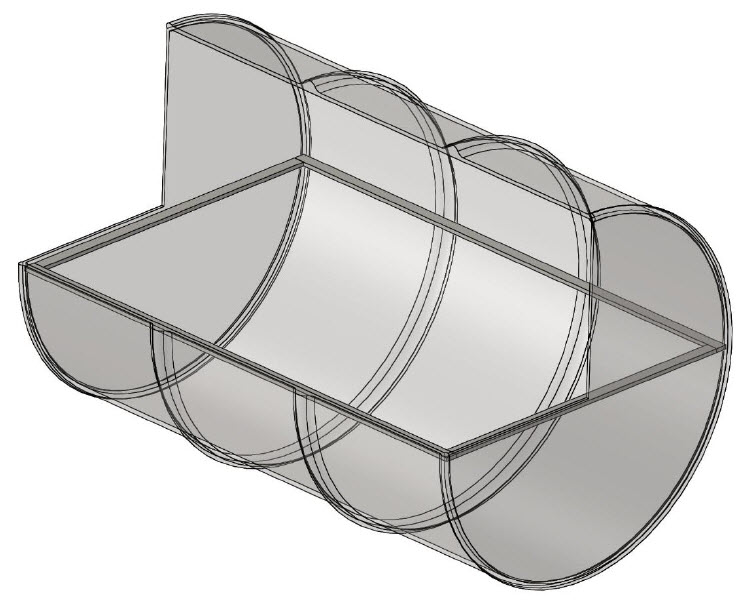
Step 1: Mark the steel drum off in quarters and cut a one quarter section out.
Step 2: Cut all the metal stock for this project according to the cut sheet drawing above.
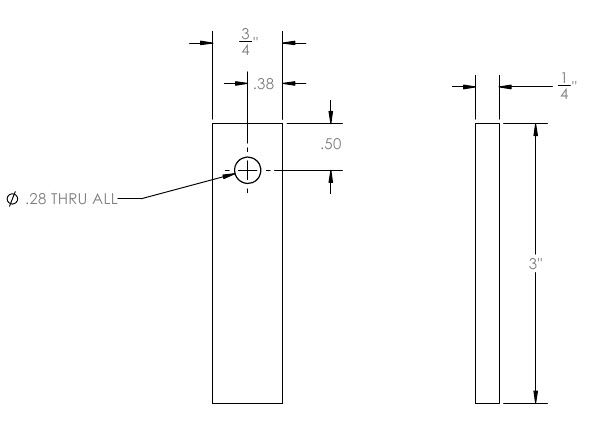
Step 3: Cut two of the grill handle arms to length and drill hole in each part according to drawing.
Step 4: Cut the actual handle for the drum grill to length and drill hole in part according to drawing.
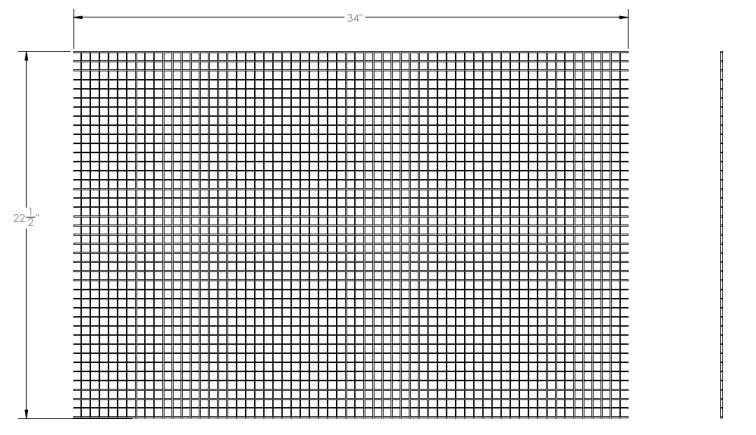
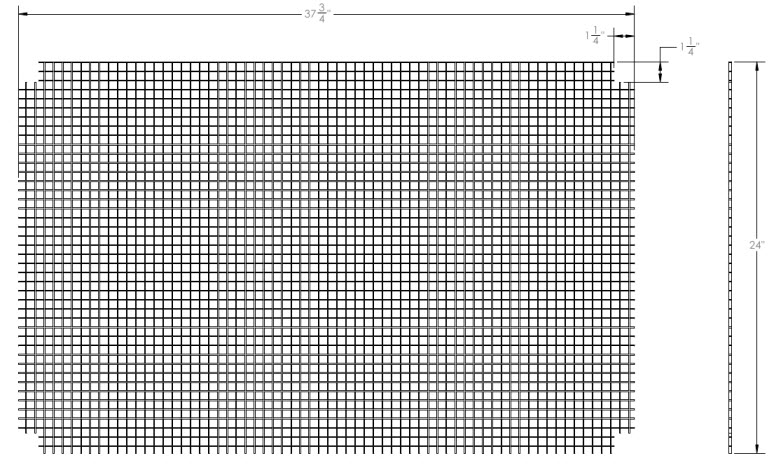
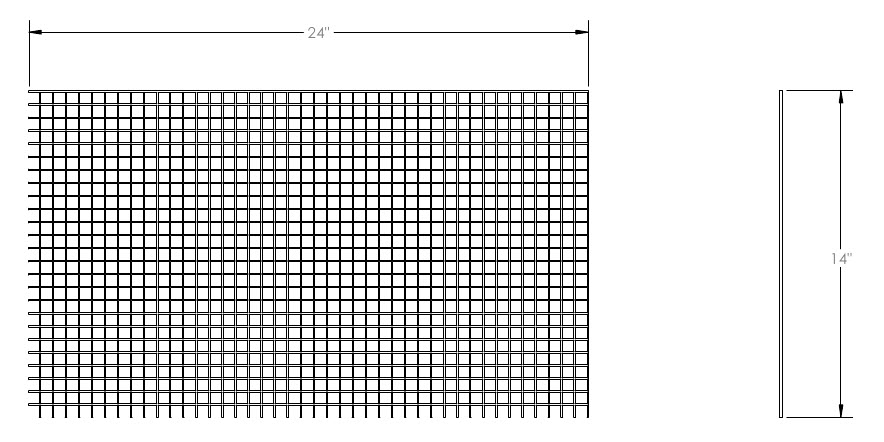
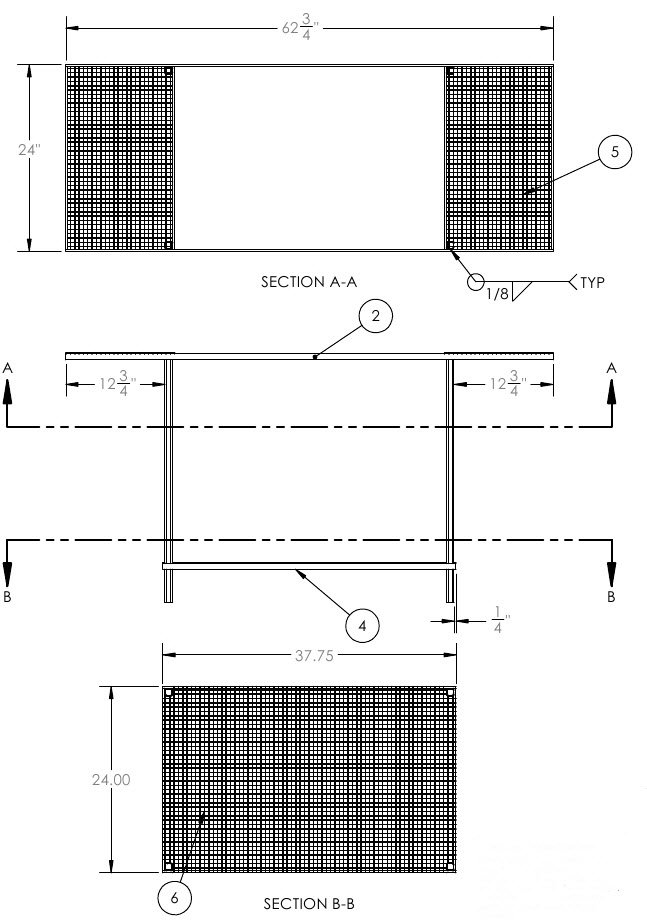
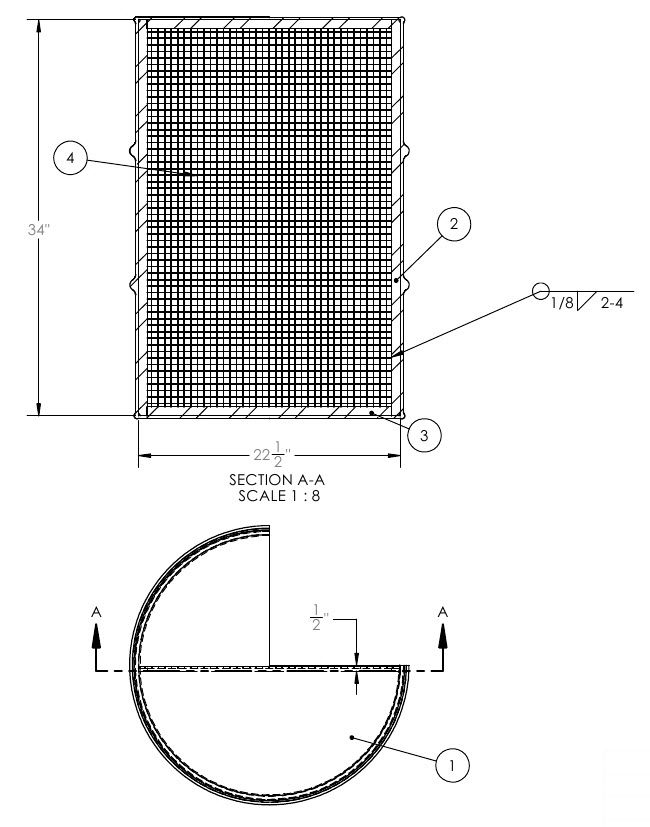
Step 5: Cut the diamond expanded sheet metal according to drawings below: main grate, shelf grate, and two of the shelf grate 2.
Grate:
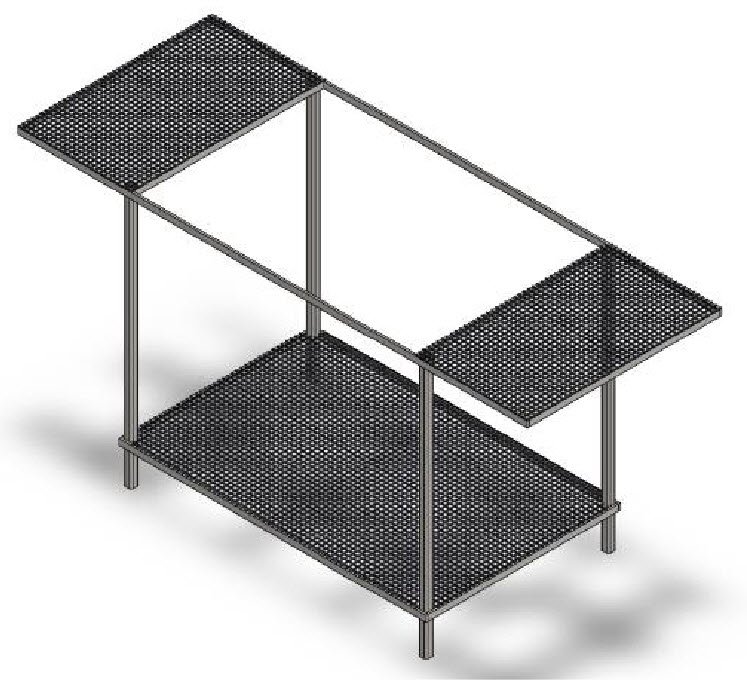
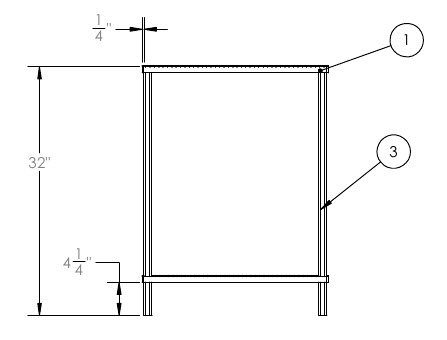
Step 6: Now we are going to weld together the frame for the drum grill. Gather all of the parts from the Cut Sheet above and lay them out on the welding surface.
Position four of the parts FC-2, and two of the FC-5 parts, and tack weld these parts in place according to the drawing titled 'DG Frame', which is below.
Position two of the FC-2 parts, two of the FC-4 parts, and tack weld the them in place according to the drawing titled 'DG Frame' drawing.
Gather both weldments, four of the part FC-6 from the cut sheet, and the shelf grate, and two of the shelf grate 2, and position them on welding surface.
Tack weld these parts in place according to the drawing titled 'DG Frame Welds' below the illustration drawing.
DG Frame Welds:
Cross reference the weldment illustrations below with this chart.
Double check all alignments and complete the welds.
Step 7: Gather the large portion of the steel drum and two of the parts FC-1, and two of the FC-3 parts, and the grate Position them on the welding surface.
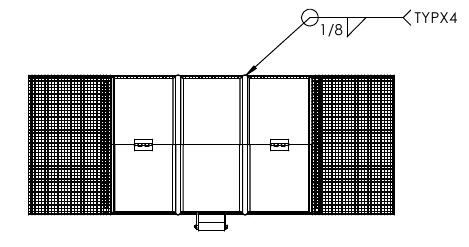
Tack weld these parts in place according to the drawing titled 'DG Welds' and below the illustrations drawings.
Double check all alignments and complete the welds.
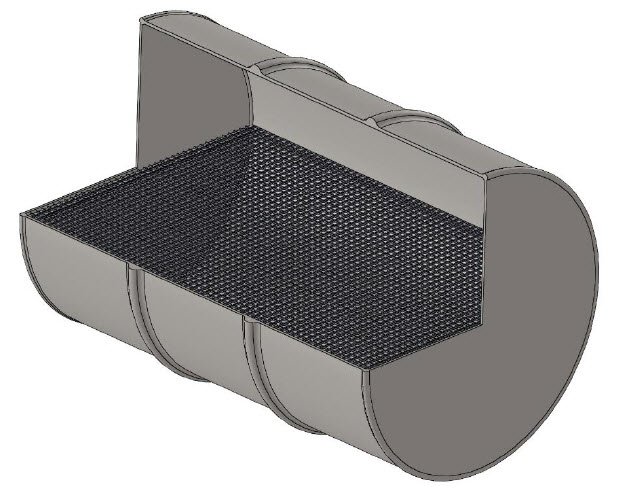
DG Welds:
Cross reference the weldments illustrated below with this chart.
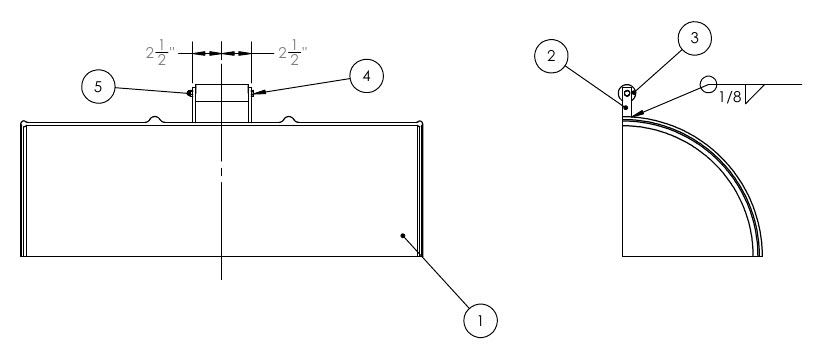
Step 8: Gather the small portion of steel drum and two of the handle arm parts, the handle, the ¼-20 X 5-1/4” LG SS Hex Bolt, and the ¼-20 SS Acorn Nut. Then, position these parts on the welding surface.
Tack weld the handle arms in place according to attached drawing titled 'DG Top Welds' which is below.
Mount the handle to the arms with the bolt.
Double check all alignments and complete the welds
DG Top Welds:
Cross reference the weldments below with this chart for assembly of the grill lid handles.
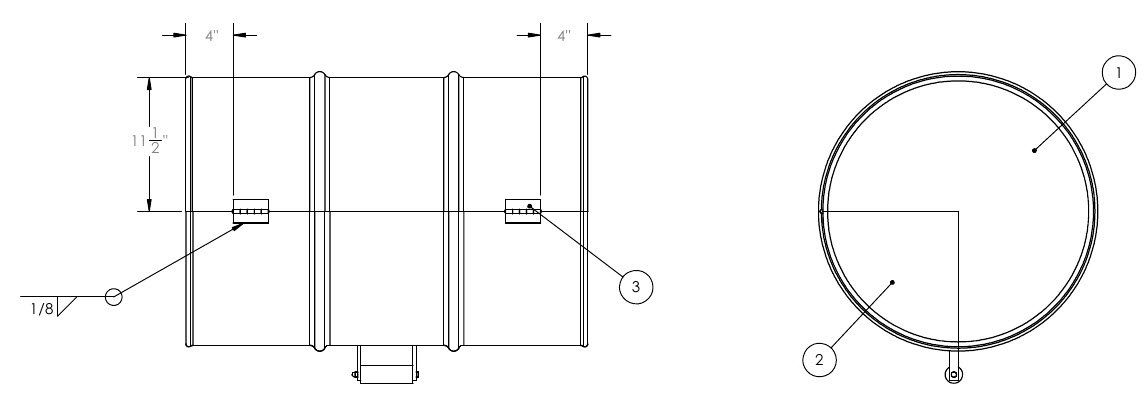
Step 9: Gather the parts for the DG Welds and the DG Top Welds and along with both hinges.
Position these parts in place and tack weld them in place according to the illustrations titled 'DG Welds' above.
Make sure the hinge door assembly works correctly.
Double Check alignments and complete the welds.
DG Top Welds:
Cross reference the weldments illustrated below with this chart.
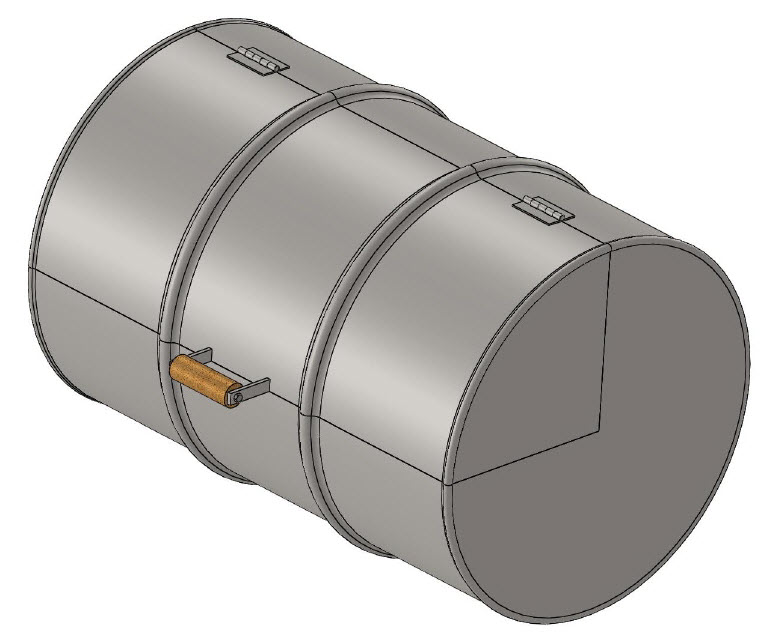
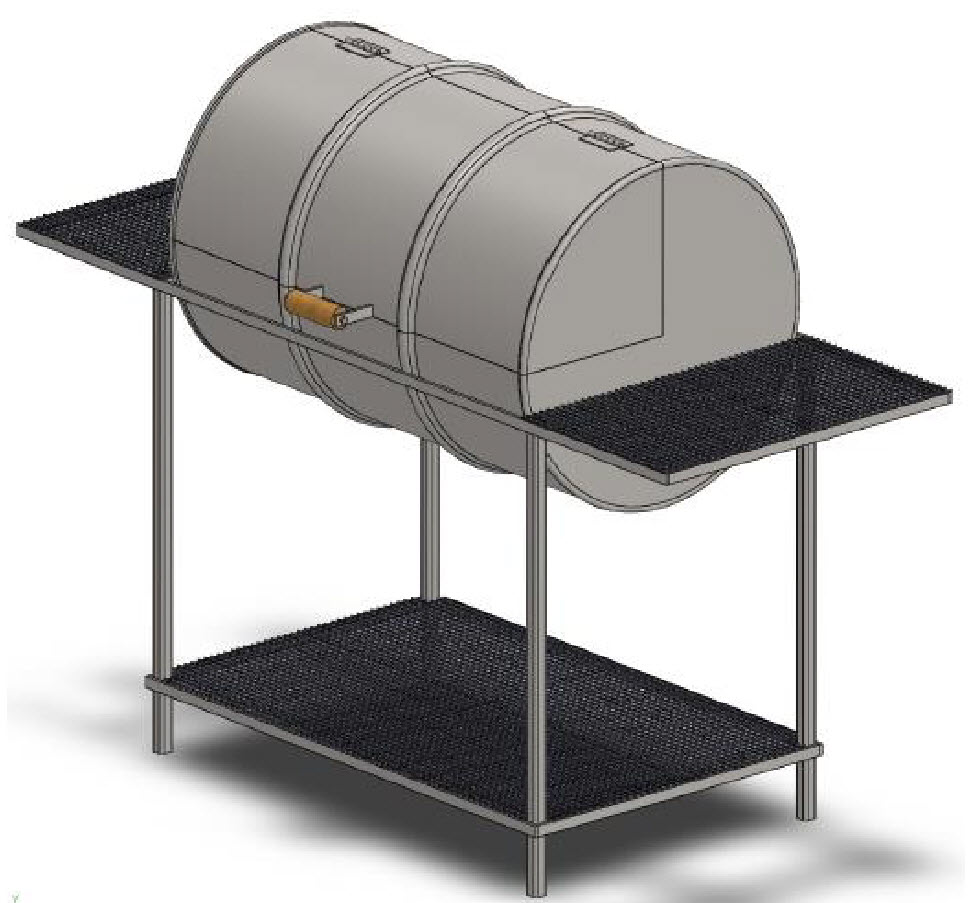
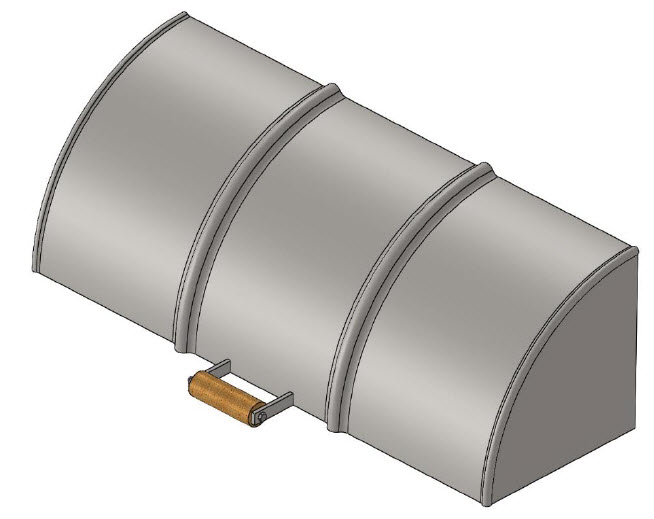
Step 10: Gather and complete the weldments for the Drum Grill Welds and Drum Grill Frame and place the grill on top of the frame according to the drawing titled '55 Gallon Drum Grill' below, and tack weld in place. Check alignment and weld in place.
55 Gallon Drum Grill!
Please let me know your feedback on this drum grill welding project. I know it's not super easy to follow because it is a web page. However, we do have a 20 page set of plans that are easier to follow due to the fact that it's a PDF and you can print them out. There is also a little more detail to each weldment.
Please share if you think this was a good tutorial. Thank you!
Welding Plans:
New! Welding Table
New! Log Splitter
Top Projects:
