How To Handle Welding Distortion!
Welding distortion occurs as a result of the forces of expansion and contraction.
When you weld you are heating the metal in a specific zone of the metal which causes the metal to expand, and then contract as it cools.
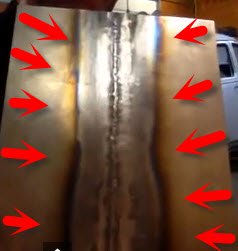
You can see the heat affected zone on the metal panel on the right, indicated by the red arrows which point to the outside edges of the zone. This metal panel was welded using a gas welding process.
So lets go over the basics of welding distortion:
As I explained above, metal expands when it gets hot, and contraction occurs when it tries to get back to it's shape as it cools down.
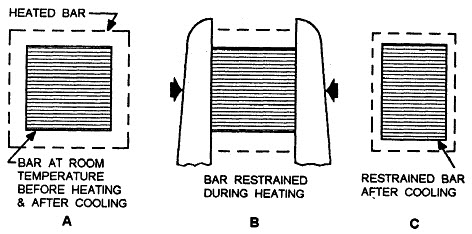
As you can see below, illustration A (below) is a top view of a metal bar that is not being clamped. It's free from restriction so when it gets hot it can expand freely in all directions. And when it cools down it can contract to it's original shape without any problems.
However, if you put the metal bar in a vice or a clamp as you can see in illustration B below, if you heat it up it can only expand in the directions of least resistance (where it has no clamps).
And when the metal cools down it will contract and it will not get back to it's original shape as you can see in illustration C below.
Expansion and Contraction:
The filler metal and parent metal joint you are welding is no different, they also expand and contract. So what? Well, as 2 metal pieces are joined they are unlikely to contact and expand in the same manner throughout the metal.
This is a complicated way of saying that the temperature changes are not uniform throughout the metal and the expansion and contraction of the metal causes stress in the metal. As a result you get welding distortion, and the metal warps.
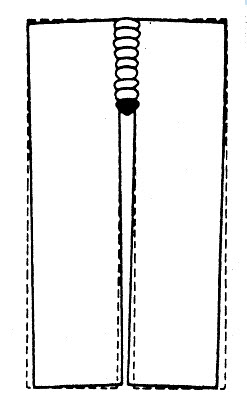
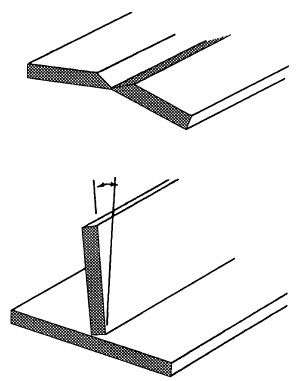
Lets say you have a single butt joint to weld as shown below. In this case the hottest part is the surface area of the weld.
Flat Work (Butt Joint) Pulled Out Of Line:
You get more expansion and contraction in where the molten weld is, and when it starts cooling off the actual weld joint starts to contract. And this is when you get welding distortion, and warping of the metal. The joint shrinks causing stress in the metal.
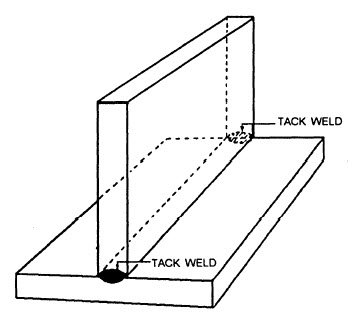
The image below illustrations how distortion affects a tee joint.
Vertical Work (Tee Joint) Pulled Out Of Center:
The illustration below reveals how welding distortion affects metal when you weld on one side of it without tack welding.
Flat Metal Drawn Into Curve:
And in the illustration below gives you another view of the metal and what happens when you begin to weld on one side without tacking it to reduce distortion and warpage.
Spacing Closes:
How To Reduce Welding Distortion!
It is very difficult to eliminate distortion because you are dealing the physics of expansion and contraction. The metal has to expand, and it has to contract. So the only way to deal with this problem is to use welding techniques that control the affects of distortion.
- Preparation: Be sure to prepare the edges of your metal well prior to welding. Beveling the edges is essential on thicker material to ensure you get good penetration and fusion of your weld. But beveling and spacing your joints will result in less distortion.
- Use tack welds: Space your tack welds approximately twelve inches apart. What should the size of a tack weld be? Some welders make small tack welds, some make larger ones. A general rule of thumb is to make the tack weld about two times the size of the weld beads thickness. Tack welds are especially important if you have a long joint to weld.
- Weld Faster: Good welders are able to weld fast but get good
penetration and fusion at the same time. This comes with practice. Don't
rush it. Why am I telling you this? Because when you weld faster the
parent metal does not absorb as much heat. And when you control the heat
in this way you limit the affects of distortion; more heat means more
welding distortion and warpage.
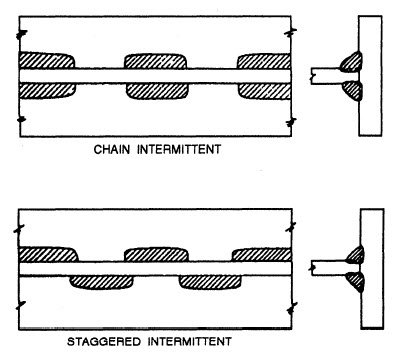
- Stagger Your Welds:
Rather than run one long bead space your welds apart. This is called
intermittent welding. It's also called skip welding, staggered
welding, and chain intermittent welding depending on the technique. When you run a bead for a long while it builds up more heat
than if you stagger your welds. Simple as that.
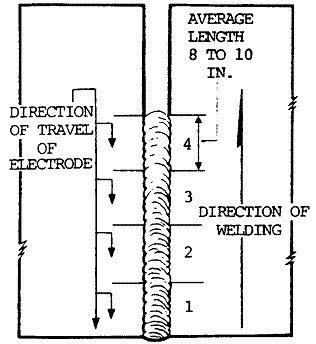
- Backstep Welding: this is a technique that is hard to explain. You kinda have to see it. But basically you make small welds along the seam, from the right side to the left side.
- Pre-heating: Because the temperatures are not the same when throughout the metal as you weld (it's really hot in the seam but not hot outside the heat affected zone of the weld), the affects of expansion and contraction are at their peak. However, if you pre-heat your metal prior to welding you can limit the affects of welding distortion and warpage by making the heat more uniform throughout the metal.
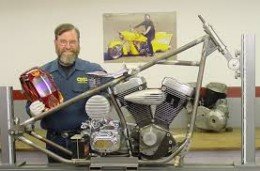
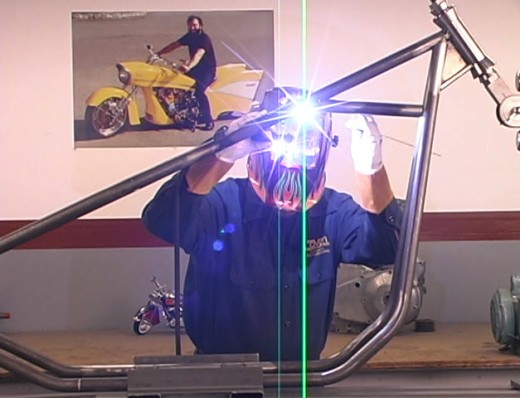
- Welding Jigs: A jig is used to hold your metal pieces in a fixed position as you weld, in order to keep it from moving. Jigs and fixtures help reduce the affects of distortion. For example, you must have a jig when building a chopper frame. The jig holds the tubing where it needs to be as you weld. Without it, if you weld the tubing together, the tubing will move (distort), and you will not be able to create a good weld as you connect the tubing together. Jigs are an essential tool for welders.
- Let It Distort! What? Yes, one technique is too anticipate distortion and angle your metal in the the opposite direction that it will distort.
- Too Many Passes: Only make the necessary number of passes to satisfactory complete your project. The more passes you make the more heat your metal is absorbing and the more it will distort. Make as few passes as possible.
Copyright WcWelding.com All Rights Reserved.
Welding Plans:
New! Welding Table
New! Log Splitter
Top Projects:
