Overhead Hoist Plans!
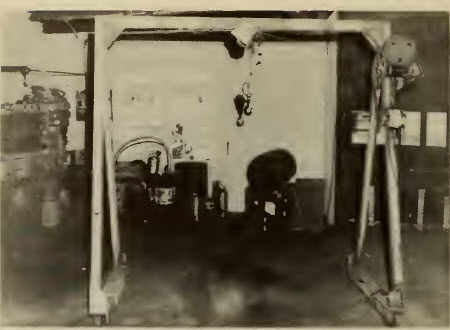
An overhead hoist or portable gantry crane is ideal if you do any work on cars or trucks or have heavy equipment to move around.
The plans I have here are very simple and easy to follow. They are vintage plans that are viable for today's shop owner.
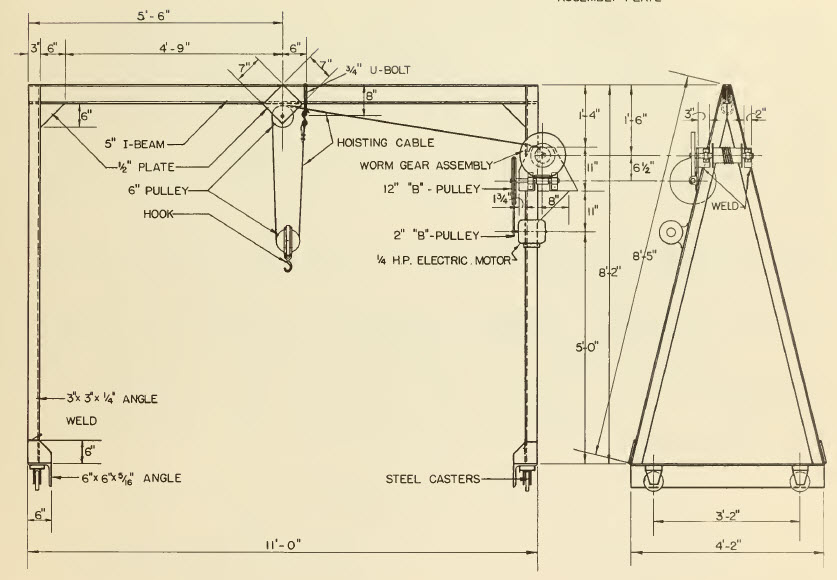
Gantry Crane Front View and Side View:
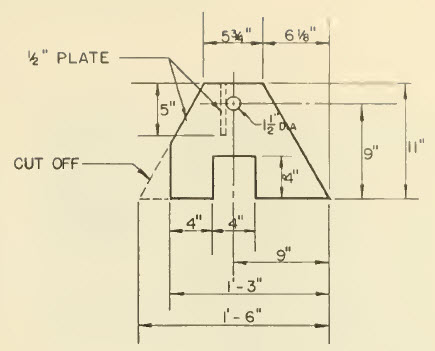
Worm Gear Assembly Plate:
I wish I built one like this the other day! I was at a friends shop and he had a 300 pound mig welder I had to get into my brothers truck. But we did not have an overhead crane to easily lift it into his truck. So we had to pick it up and put it on it's side, which you don't want to do because it can damage the sensitive parts inside. Then, when we got to my shop we had to lift it out. It was heavy and awkward.
And that was just one time I needed it. There are numerous uses for it, especially if you are working on cars, tractors, and other autmotive related projects.
You can even build an overhead hoist similar to this one and sell it for a nice profit.
Materials Needed:
|
|
You'll need bolts and steel parts for mounting of the hoist.
How To Build The Overhead Hoist!
- Cut the 6 inch x 6 inch angle iron base metal and the 3 inch x 3 inch upright pieces to the length you desire.
- To get a rough estimate of the angles you want for the longer angle iron you can simply use the floor and chalk it out to scale. The I beam will sit on top so you'll want to cut the ends so that it will fit properly.
- Now you will take the triangles you created and weld them together. By the way, be aware of the 6 inch gussets where the 3 inch angle iron joins the 6 inch angle iron.
- Weld the 7 inch plate squares in the middle of the I beam. In addition you'll want to weld a loop on the I beam which will be where the cable will be attached.
- Now you will lay the actual overhead hoist on the I beam after welding it to the frame, and lay it from one side of the I beam to the other (you'll see when you have it in your hands).
- Then, in between the legs of the crane and the I beam, weld the 6 inch x 6 inch x .5 inch reinforcement triangles.
- Now it's time to put the worm gear crane assembly on. After you do this get the cable and attach it.
- Finally, mount the casters by either welding them on or bolting them in, and you are done.
Note: You can also use a manual winch or chain type hoist instead of an electric one for this overhead crane.

Copyright WcWelding.com All Rights Reserved.
Welding Plans:
New! Welding Table
New! Log Splitter
Top Projects:


